
Getting Started
Quick start guide to get up and running with Zorora in minutes.
Prerequisites
System Requirements
- Python 3.8+
- macOS (Apple Silicon) - Optimized for M1/M2/M3 Macs
- LM Studio running on
http://localhost:1234- Download: lmstudio.ai
- Load a 4B model (e.g., Qwen3-VL-4B, Qwen3-4B)
- Nehanda v3 (recommended) - Hosted RAG synthesis model for high-quality research output
- Endpoint:
http://nehanda.asoba.co:8000/v1/chat/completions - Model:
nehanda-rag-synthesis-27b(fine-tuned Qwen3.6-27B, 88.7% on FACTS Grounding) - No local GPU required — the endpoint is hosted via vLLM
- Endpoint:
- RAM: Minimum 4GB (runs efficiently on MacBook Air M3)
- Storage: Local storage for research data (
~/.zorora/)
Optional Prerequisites
- HuggingFace token (optional) - For remote Codestral endpoint
- Brave Search API key (optional) - For enhanced web search
- Get free API key at: https://brave.com/search/api/
- Free tier: 2000 queries/month (~66/day)
- Flask (for Web UI) - Installed automatically with package
Installation
Step 1: Download Latest Release
Recommended: Download from GitHub Release
Step 2: Install Zorora
From GitHub Release (recommended):
# Download and extract the release package
# Then install:
pip install -e .
From GitHub (development):
pip install git+https://github.com/AsobaCloud/zorora.git
From source:
git clone https://github.com/AsobaCloud/zorora.git
cd zorora
pip install -e .
Step 3: Verify Installation
# Check if zorora command is available
zorora --help

# Or check version
python -c "import zorora; print(zorora.__version__)"
Configuration
Basic Configuration
Zorora works out of the box with LM Studio running locally. No configuration required for basic usage.
Advanced Configuration
Web UI Settings Modal (Recommended):
- Start the Web UI:
python web_main.py(orzorora web) - Click the ⚙️ gear icon in the top-right corner
- Configure LLM models and endpoints:
- Model Selection: Choose models for each tool (orchestrator, codestral, reasoning, search, intent_detector, vision, image_generation)
- Endpoint Selection: Select from Local (LM Studio), HuggingFace, OpenAI, or Anthropic
- API Keys: Configure API keys for HuggingFace, OpenAI, and Anthropic
- Add/Edit Endpoints: Click “Add New Endpoint” to configure custom endpoints
- Click “Save” - changes take effect after server restart
Manual Configuration:
- Copy
config.example.pytoconfig.py - Edit
config.pywith your settings:- LM Studio model name
- HuggingFace token (optional)
- OpenAI API key (optional)
- Anthropic API key (optional)
- Brave Search API key (optional)
- Specialist model configurations
- Endpoint mappings
Configuring the Nehanda v3 Endpoint
Nehanda v3 is the recommended model for RAG synthesis — it produces higher-quality, better-grounded research output than the default local model.
Via Web UI Settings Modal:
- Open the Web UI and click the ⚙️ gear icon
- Under Endpoints, click “Add New Endpoint”
- Configure as a HuggingFace endpoint:
- Name:
nehanda-vllm - URL:
http://nehanda.asoba.co:8000/v1/chat/completions - Model name:
nehanda-rag-synthesis-27b - API format:
openai - Timeout:
180 - Enabled:
true
- Name:
- Under Model Selection, set the reasoning and synthesis roles to use the
nehanda-vllmendpoint - Click “Save” and restart the server
Via config.py (Manual):
Add the endpoint under HF_ENDPOINTS in config.py:
HF_ENDPOINTS = {
    "nehanda-vllm": {
        "url": "http://nehanda.asoba.co:8000/v1/chat/completions",
        "model_name": "nehanda-rag-synthesis-27b",
        "api_format": "openai",
        "timeout": 180,
        "enabled": True,
        "chat_template_kwargs": {"enable_thinking": False},
    },
}
Then map the reasoning/synthesis roles to nehanda-vllm in your model configuration.
Web Search Setup
Brave Search API (recommended):
- Get free API key at: https://brave.com/search/api/
- Free tier: 2000 queries/month (~66/day)
- Configure in
config.py:BRAVE_SEARCH = { "api_key": "YOUR_API_KEY", "enabled": True, }
DuckDuckGo Fallback:
- Automatically used if Brave Search unavailable
- No API key required
First Research Query
Web Interface
Start the Web UI:
python web_main.py
# Or if installed via pip:
zorora web
Access the interface:
- Open
http://localhost:5000in your browser
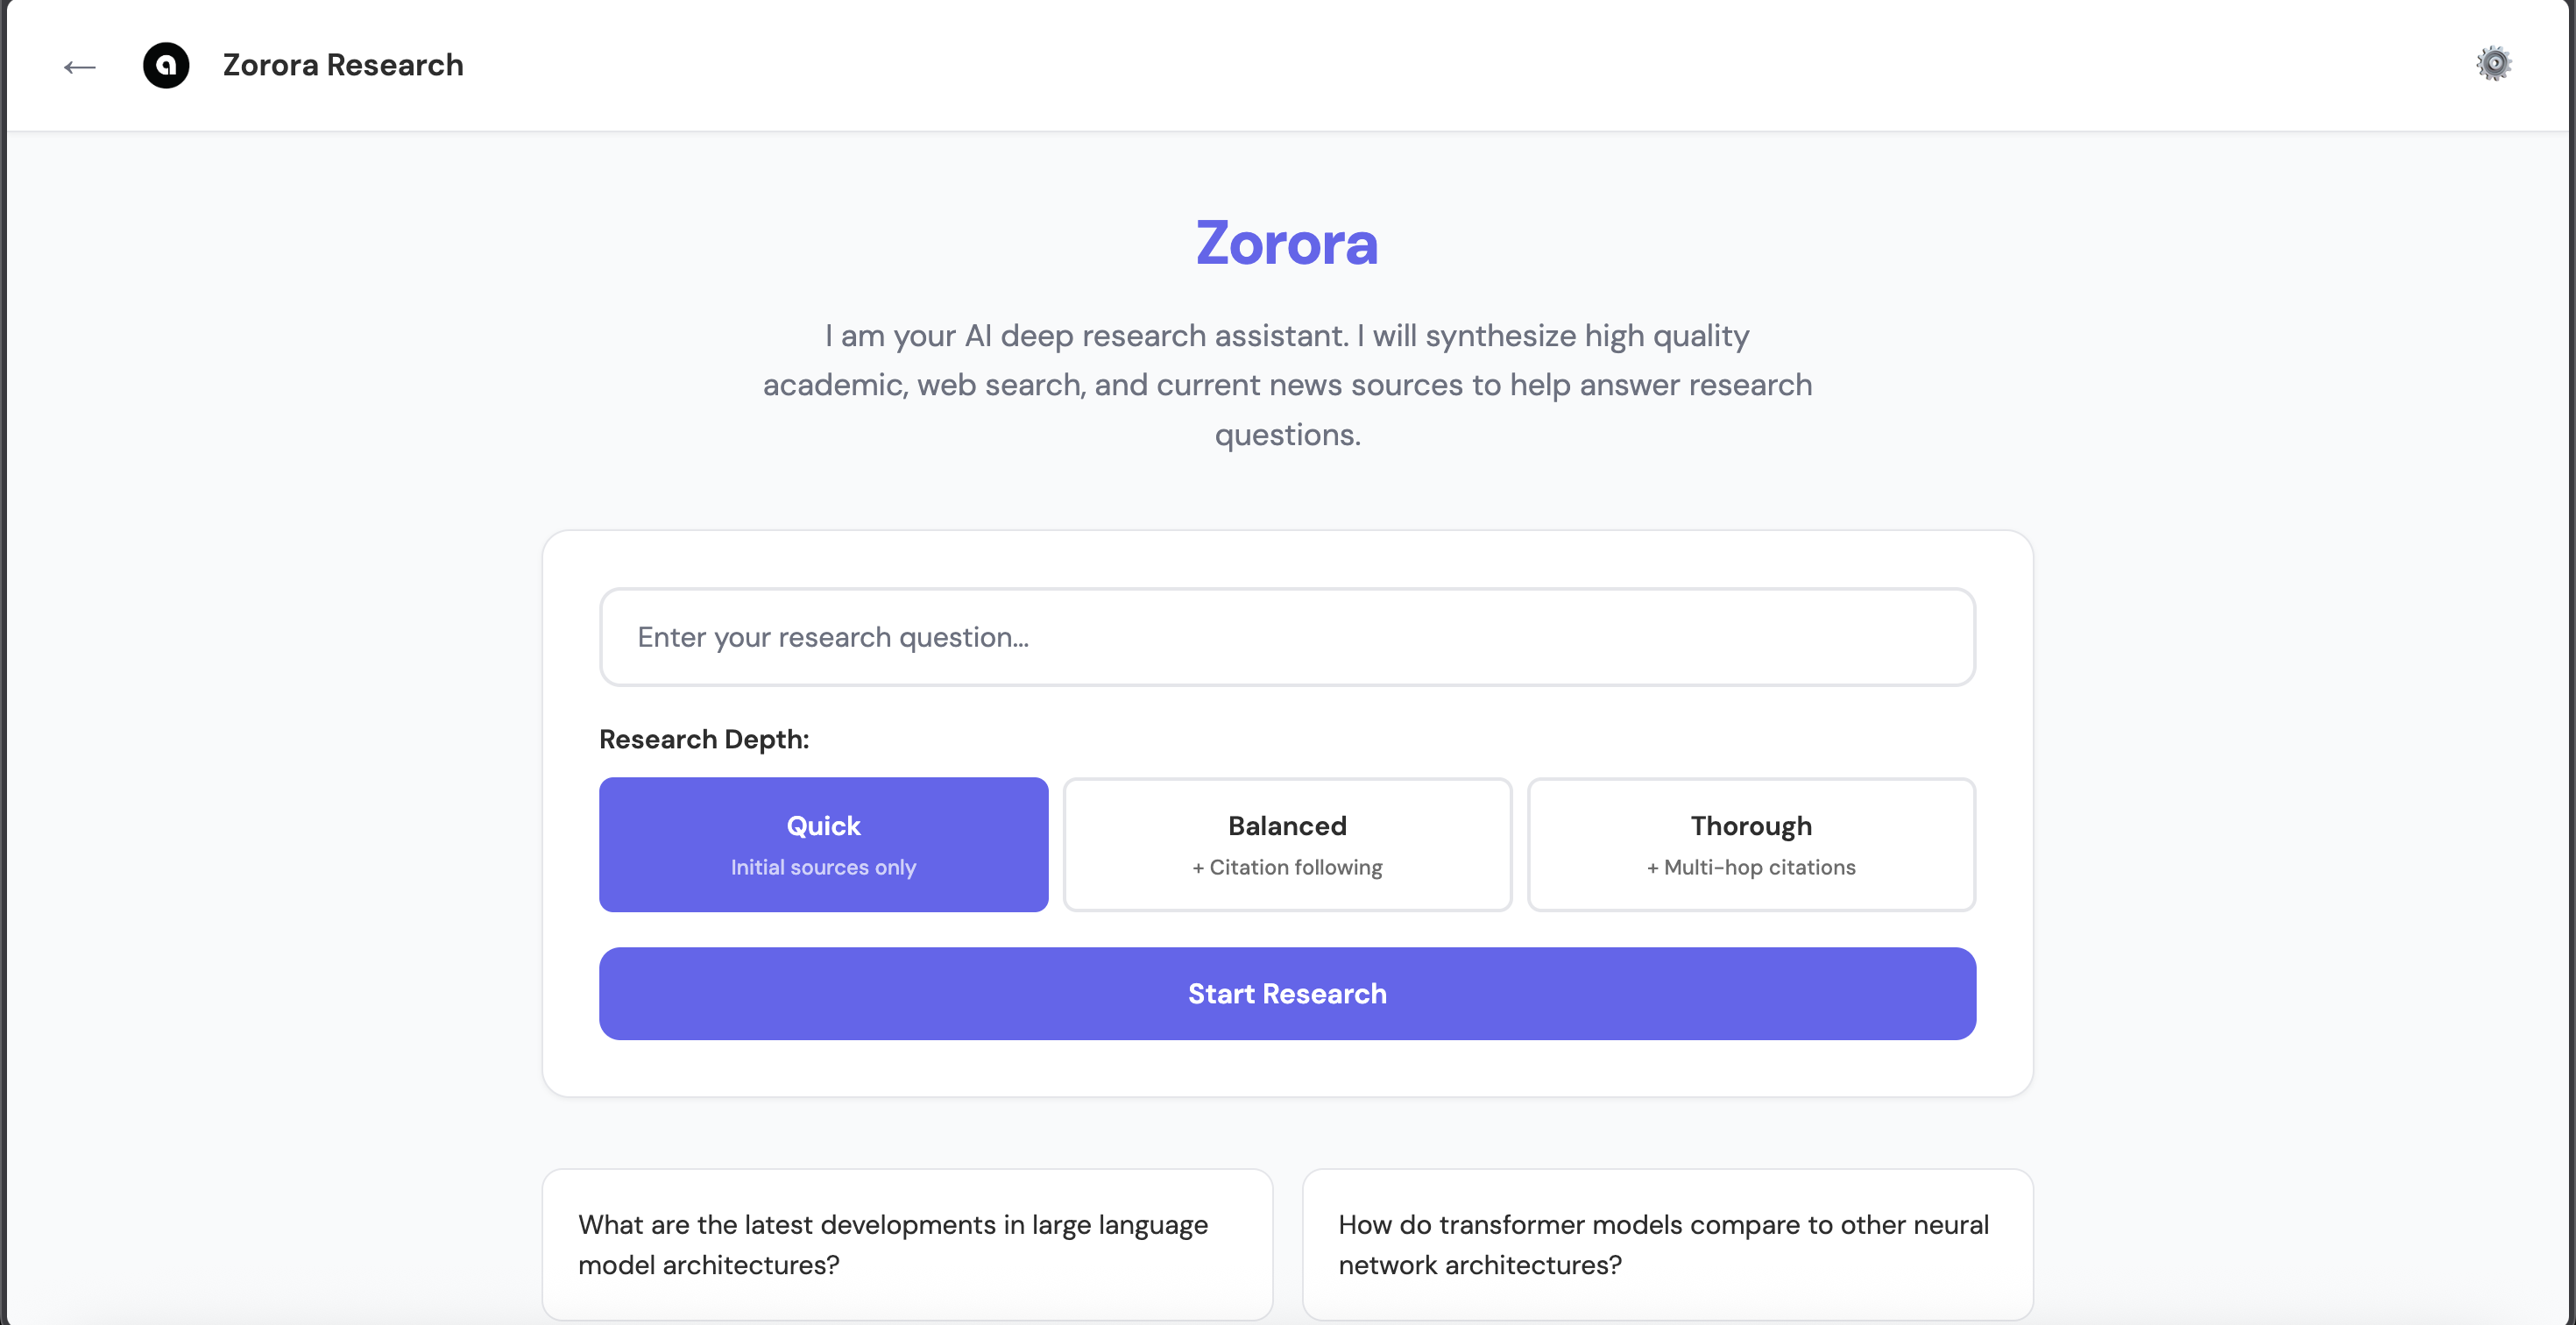 Web UI interface
- Select mode based on your task:
- Deep Research - multi-source synthesis workflow
- Digest - stage articles/datasets for focused synthesis
- Global View - country map + topic/source drilldown
- Imaging - geospatial deposits/concessions/generation overlays
- Enter research question in the search box (Deep Research mode)
- Select depth level:
- Quick - Initial sources only (depth=1, ~25-35s)
- Balanced - + Citation following (depth=2, ~35-50s) - Coming soon
- Thorough - + Multi-hop citations (depth=3, ~50-70s) - Coming soon
- Click “Start Research”
- View synthesis, sources, and credibility scores
What happens automatically:
- ✅ Aggregates sources from academic databases (7 sources), web (Brave + DDG), and newsroom (parallel)
- ✅ Scores credibility of each source (multi-factor: domain, citations, cross-references)
- ✅ Cross-references claims across sources
- ✅ Synthesizes findings with citations and confidence levels
- ✅ Saves results to local storage (
~/.zorora/zorora.db+ JSON files)
API (Programmatic Access)
from engine.research_engine import ResearchEngine

engine = ResearchEngine()
state = engine.deep_research("Your research question", depth=1)
print(state.synthesis)
Verify Results
Check Research Storage
Research is automatically saved to local storage. Verify it exists:
# Check SQLite database
ls -la ~/.zorora/zorora.db

# Check JSON files
ls -la ~/.zorora/research/findings/
Test Different Workflows
Deep Research Query:
- In the Web UI, select Deep Research mode
- Enter a research question, e.g.: “What are the latest developments in large language model architectures?”
- Select Quick depth
- Click “Start Research”
- Review the synthesized report, source list, and credibility scores
Digest Mode:
- Select Digest mode in the Web UI
- Stage articles or datasets you want to synthesize
- Run the digest to produce a focused synthesis from your curated sources
Discovery Map (Global View):
- Select Global View mode in the Web UI
- Explore the country map to drill down into topics and sources by region
- Click a country or topic to surface relevant research and data
Terminal-Based Coding Workflows
Zorora’s Web UI focuses on research and intelligence. For terminal-based coding workflows (code generation, development assistance), we recommend nehanda-cli — a dedicated open-source CLI tool:
- Repository: github.com/AsobaCloud/nehanda-cli
- Install with:
pip install git+https://github.com/AsobaCloud/nehanda-cli.git
Troubleshooting
LM Studio Not Connected
Problem: Error connecting to LM Studio
Solution:
- Start LM Studio
- Load a model on port 1234
- Verify connection:
curl http://localhost:1234/v1/models
Research Workflow Not Triggered
Problem: Query doesn’t trigger deep research
Solution: Use the Deep Research mode in the Web UI and ensure your question includes research keywords: “What”, “Why”, “How”, “Tell me”.
Can’t Save Research
Problem: Research not saving to disk
Solution: Check ~/.zorora/research/ directory exists and is writable:
mkdir -p ~/.zorora/research/findings
chmod 755 ~/.zorora/research
Endpoint Errors (HF/OpenAI/Anthropic/Nehanda)
Problem: API endpoint errors
Solution:
- Check endpoint URL (for HF endpoints, including Nehanda v3)
- Verify API keys are configured (use Web UI settings modal)
- Ensure endpoints are enabled in config
- Check API rate limits (OpenAI/Anthropic)
- Verify model names match provider requirements
- For Nehanda v3, confirm
http://nehanda.asoba.co:8000is reachable
Web UI Not Starting
Problem: Web UI fails to start
Solution:
- Ensure Flask is installed:
pip install flask - Run:
python web_main.py(orzorora webif installed via pip) - Check port 5000 is available
Deep Research Not Working
Problem: Deep research workflow fails
Solution:
- Check that research tools are accessible:
from tools.research.academic_search import academic_search - Verify storage directory exists:
~/.zorora/(created automatically) - Check logs for API errors (Brave Search, Newsroom API)
Next Steps
- Guides - Comprehensive guides for all features
- Web UI - Master the browser-based interface
- Research Workflow - Deep dive into research capabilities
- API Reference - Programmatic access documentation
See Also
- Introduction - Overview of Zorora architecture and features
- FAQ - Frequently asked questions
- Technical Concepts - Deep dive into how Zorora works
- Use Cases - Real-world examples